Hello all! I have been a busy mumma! Making my sons 2nd birthday cake! My oldest daughter came up with a design/ concept months ago, and i was really trying to stick to it. (The concept was the cake be an open "A,B,C" type book) Featuring aeroplanes on one page and birds on the other. Whalah! Baxter's three favourite things!!
So with that in mind, and my gum paste i had prepared a couple of days prior, i started with the sugar figurines. There was to be an aeroplane, with a little cartoon Baxter sitting in it, and a bird. Here they are (not yet dry):

This is where i started to struggle, i mean how was i going to incorporate the 3-d shapes into the pages of the book? (as they ended up a bit bigger than planned) not only that, but how was i going to shape the cake? would it ruin what i had planned to do inside? hmmm. I abandoned the book idea and went to a basic square. I had planned to do a coloured layer cake, and completely unintentionally, ended up creating a colour scheme out of his favorite colours. BONUS!! So blue, green, red and yellow it is!!
Well, i did want to achieve a bit of a statement with the inside of the cake! To create just as much fun on the inside, as on the outside! so i made pure white cake batter, and buttercream, and proceeded to make a 4 layer cake with the aforementioned colours. STRIKING!! :) here they are--->


And all constructed ready for fondant (and a tidy up! lol):

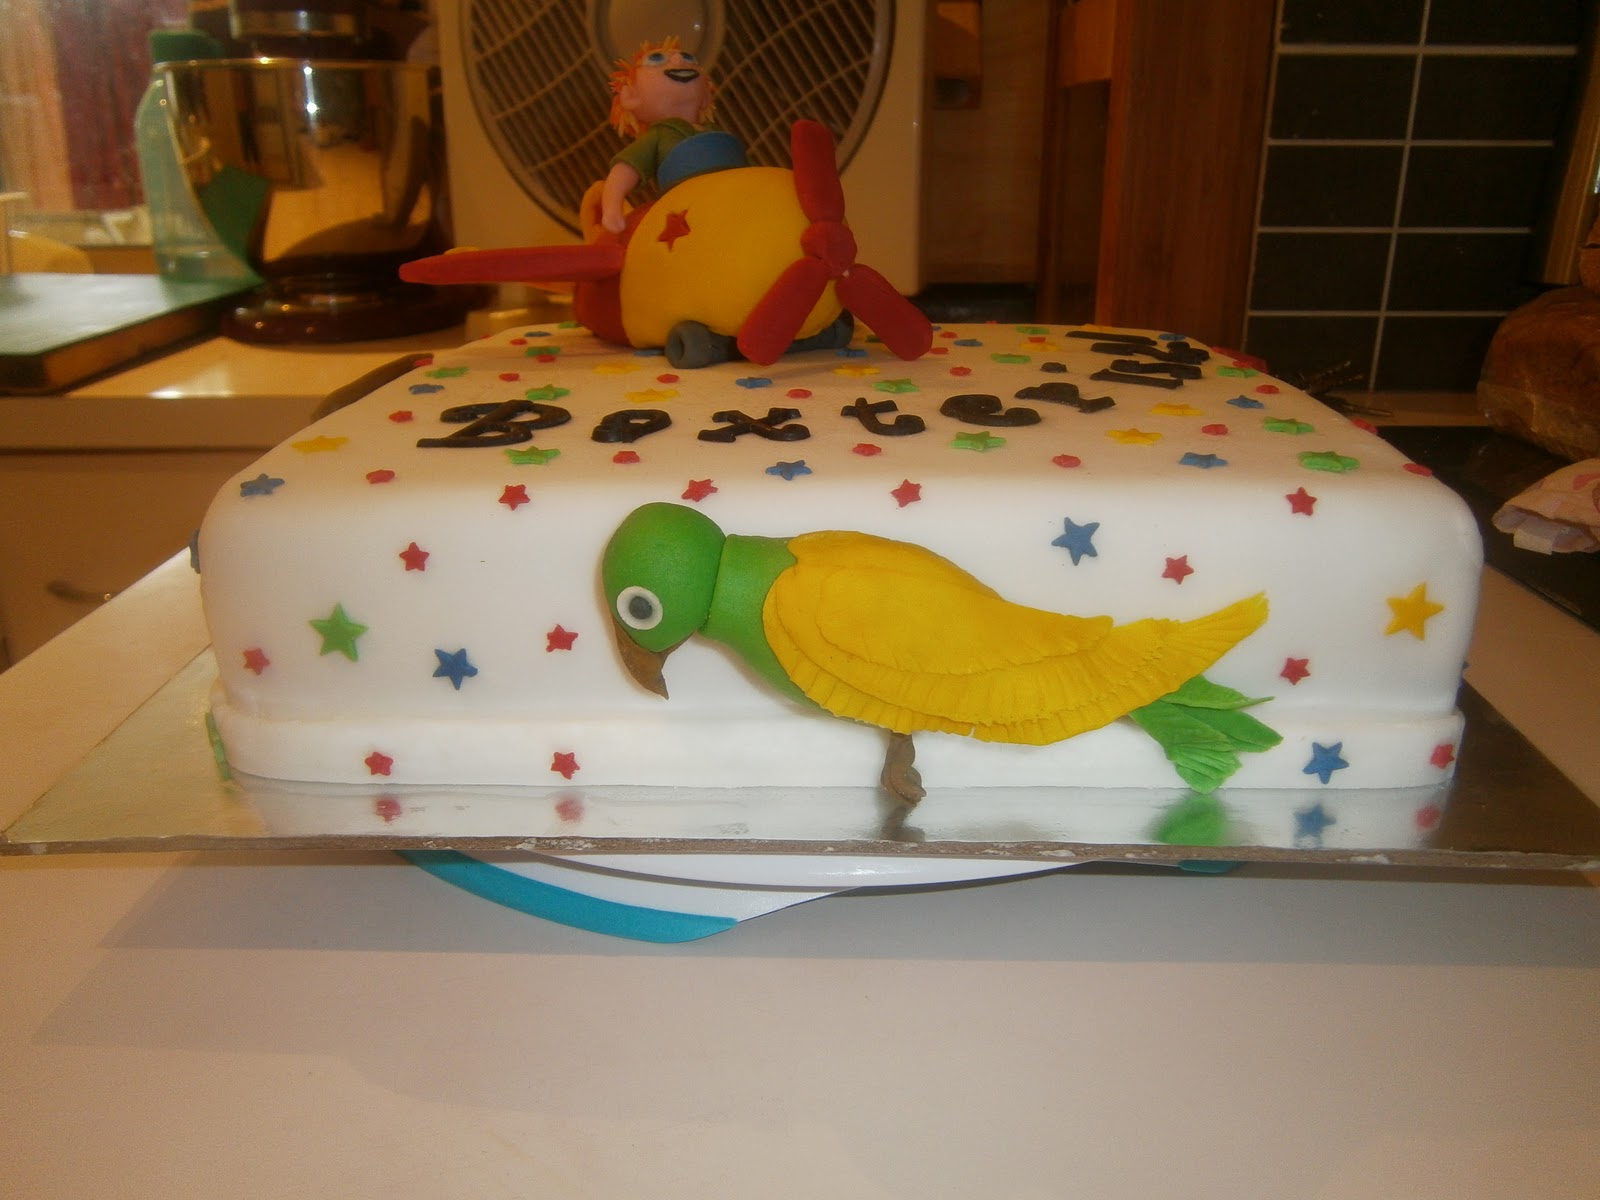
Things were starting to tie in a lot better! Turns out, the aeroplane turned out to be a perfect size cake topper for the square cake size i had chosen. Even thought it is a boring old square cake, i thought it would have enough going on, to still be pretty visually interesting. The sides of the cake provided a place to add some more of his favourites things too! So with some left over gumpaste, i shaped the little excavator, a book case complete with a few books, and the fruit! [also a fruit basket i didn't end up using] I also cut out a variety of different sized stars to match the aeroplane, and tie in the colour theme a little better.....This turned out to be an amazing addition, as i was able to balance the colours out evenly (for example, the bird was green and yellow, so i surrounded it in mainly red and blue stars. (i cant help it i need some symmetry!!)


So a quick batch of fondant went on (i still need to work on my technique here) and then the sticking began! To finish, i added the lettering and placed the topper!!
DONE!!!

The four sides:


No comments:
Post a Comment